| View previous topic :: View next topic |
| Author |
Message |
arlurt
Show Star !

Joined: 28 Nov 2006
Posts: 680
Location: North Yorkshire
|
 Posted: Mon Mar 09, 2015 3:32 pm Post subject: Posted: Mon Mar 09, 2015 3:32 pm Post subject: |
 |
|
Glad to see you're making progress Cal, I hope the cylinder is as easy to free-off as mine was. I like your spare spark plug holder!
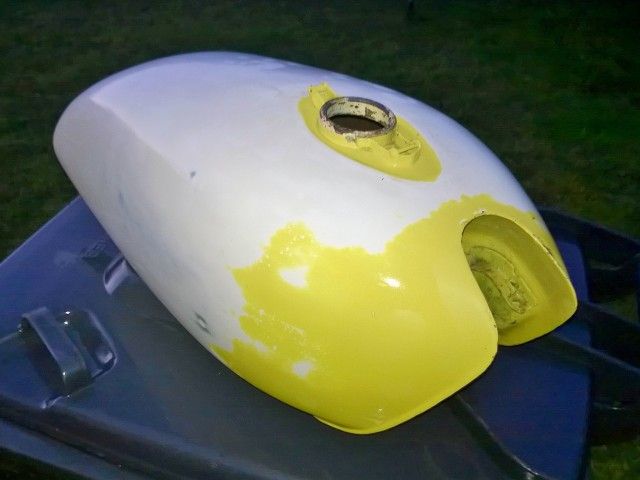
I started work on the petrol tank yesterday. The underside and the back of the tank where the seat sits against it were quite rusty. I've used a wirebrush in the angle grinder to clean that up and primed it with Zinc 182. The rest of the tank isn't that bad. I'll flat it all down, and the new primer, then get it painted up to match the side panels. The bike used to be white so I'll sand off all of the yellow so I don't have to use so much white primer to cover it up. Seems to get a better finish as well, the yellow was never really any good.
Then it's decal time again, I hope these don't react like one of the side panels did...
That reminds me as well, I've cleaned up the oil tank and fitted a new O ring to the sight glass.
I've brought the clocks, handlebar risers and top yoke home to clean up and paint as well. I hadn't intended to go this far, but each bit I clean or paint makes the uncleaned and unpainted bit next to it look nasty. I must learn restraint.
_________________
Light is right.
Last edited by arlurt on Mon Mar 09, 2015 9:59 pm; edited 1 time in total |
|
| Back to top |
|
 |
arlurt
Show Star !
Joined: 28 Nov 2006
Posts: 680
Location: North Yorkshire
|
| Posted: Mon Mar 09, 2015 9:57 pm Post subject: |
|
|
Now, while my wife's away for a few days, where could I dry freshly painted and lacquered parts...?
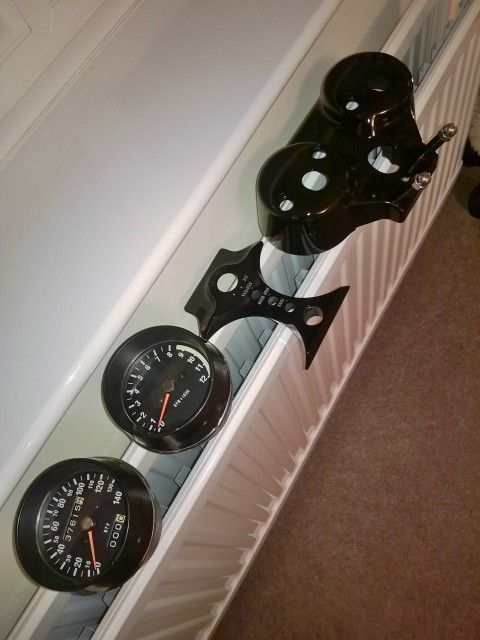
Of course! On the lounge radiator. How long does it take for the smell of paint to dissipate?
_________________
Light is right. |
|
| Back to top |
|
|
arlurt
Show Star !
Joined: 28 Nov 2006
Posts: 680
Location: North Yorkshire
|
| Posted: Tue Mar 10, 2015 7:28 pm Post subject: |
|
|
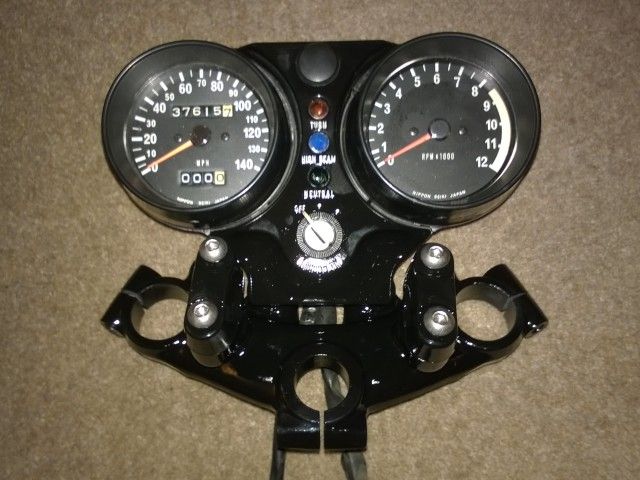
Clocks back together, just waiting for a bag of new bulbs. I've managed to put them together in an order that hides most of their history... That is accident damage.

Anyone know what to use to fill the recessed letters "IGNITION"? I've got the same issue with the left and right switch gear, I thought of paint but decided wiping the excess off would mark the finish on the stuff I've just painted.
_________________
Light is right. |
|
| Back to top |
|
|
Gillinghampaul
Joined: 15 Aug 2012
Posts: 655
Location: Kent
|
| Posted: Tue Mar 10, 2015 8:19 pm Post subject: |
|
|
I think paint and wipe is the way not sure how easy it would be to pick everything out, i know my hand isnt steady enough!
_________________
Gagging for it |
|
| Back to top |
|
|
1975-S1C
Joined: 25 Feb 2013
Posts: 22
Location: Bristol
|
| Posted: Tue Mar 10, 2015 8:33 pm Post subject: |
|
|
I did mine by using an ultra fine artists brush and then wiping any excess off straight away. Came out fine. If you want it to be standard, that bit of writing is in yellow paint.
Good luck with it
Paul |
|
| Back to top |
|
|
arlurt
Show Star !
Joined: 28 Nov 2006
Posts: 680
Location: North Yorkshire
|
| Posted: Tue Mar 10, 2015 11:54 pm Post subject: |
|
|
This maybe not the best of ideas, but they never are when you've just come in from the pub...
We've got a chalk board in the kitchen with my "To Do" list on it, and one of those chalk-marker pens. I've filled the letters with "chalk" and wiped the excess off. I'll top up any missed bits tomorrow then leave it to dry. Then I'll lacquer over it.
What do you think....? Is it just the beer coming up with good ideas?
_________________
Light is right. |
|
| Back to top |
|
|
arlurt
Show Star !
Joined: 28 Nov 2006
Posts: 680
Location: North Yorkshire
|
| Posted: Wed Mar 11, 2015 8:29 pm Post subject: |
|
|
Maybe the beer was right. The chalk seems to have lacquered in OK. Sorry but I chose white rather than the yellow original.

I've had a go at the top yoke tonight as well, it's come out all right. I'll bring it all together when the paint's dry and throw it back on the bike.
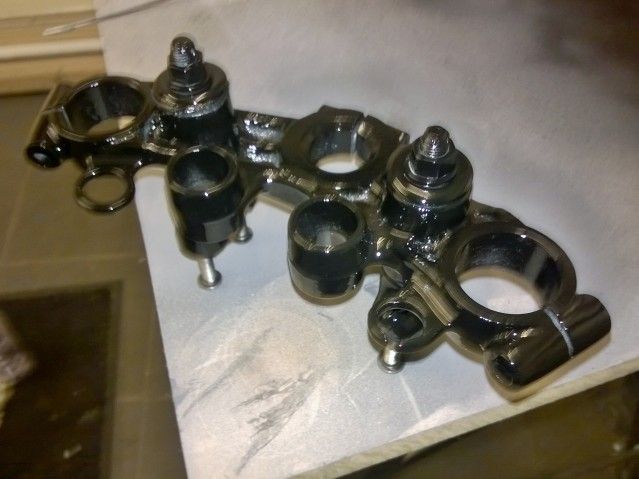
They don't look that blurred in real life. 
_________________
Light is right. |
|
| Back to top |
|
|
arlurt
Show Star !
Joined: 28 Nov 2006
Posts: 680
Location: North Yorkshire
|
| Posted: Wed Mar 11, 2015 10:10 pm Post subject: |
|
|
I'm happy with that. Now, where's the next scabby bit...?
_________________
Light is right. |
|
| Back to top |
|
|
arlurt
Show Star !
Joined: 28 Nov 2006
Posts: 680
Location: North Yorkshire
|
| Posted: Thu Mar 12, 2015 9:43 pm Post subject: |
|
|
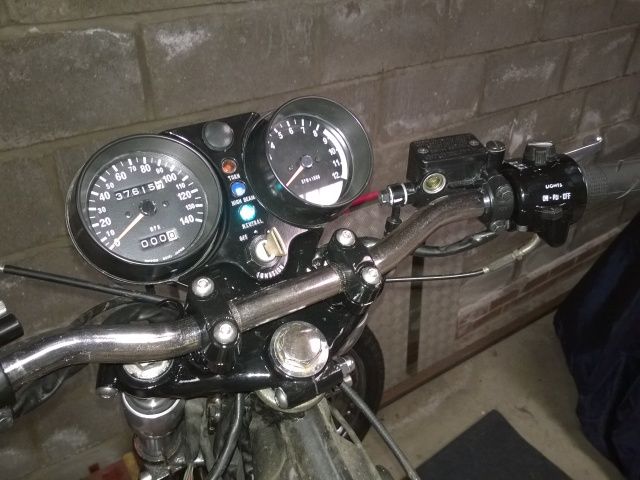
Threw the clocks back at the bike tonight and they stuck. Must be good enough for the job.
The handlebars and switch gear now look pretty poor so I've brought them home for a tickle next. Now I'm Sooo good at filling recessed lettering with chalk and lacquer I'll see if I can make them look any better than their present sorry state.
_________________
Light is right. |
|
| Back to top |
|
|
arlurt
Show Star !
Joined: 28 Nov 2006
Posts: 680
Location: North Yorkshire
|
| Posted: Fri Mar 13, 2015 6:43 pm Post subject: |
|
|
Hope I haven't over reached myself.

They seem OK so far, but I won't be impressing the restoration boys.

She's only away until Sunday so I'd better get on and finish my painting.
I've been trying to recover some of the dodgy chrome parts, the handlebars, headstock bolt and washer were all pretty bad. Let's see how a wire brush and a coat of lacqure brings them up.
_________________
Light is right. |
|
| Back to top |
|
|
arlurt
Show Star !
Joined: 28 Nov 2006
Posts: 680
Location: North Yorkshire
|
| Posted: Fri Mar 13, 2015 6:53 pm Post subject: |
|
|
The electrics on the bike were always pretty weak at tick-over for the MoT. Indicators wouldn't flash and lights pulsing. With the old 9 spark electronic ignition and a low battery it wouldn't start if the lights were on or the brake lever was held.
Has anyone tried LED bulbs to reduce electrical load? I've bought six for the idiot lights, front sidelight and instrument lighting, they're only a quid each. The old bulbs were shot, so I had to get something. I've also got an LED brake/tail light for a couple of quid. I think the indicators need the electrical load to make them flash so they'll have to stay as they are. The idiot light ones seem a bit bright but I'll give 'em a go.
_________________
Light is right. |
|
| Back to top |
|
|
Gillinghampaul
Joined: 15 Aug 2012
Posts: 655
Location: Kent
|
| Posted: Fri Mar 13, 2015 8:14 pm Post subject: |
|
|
You can put resistors in the circuit to load up for the leds to work , but this is pretty much the same as having bulbs, or use an led compatible flasher relay? This might not load the system so much, another way of helping would be to use led indicators in just the front or just the back, the bulb should make it work ok like that.
_________________
Gagging for it |
|
| Back to top |
|
|
arlurt
Show Star !
Joined: 28 Nov 2006
Posts: 680
Location: North Yorkshire
|
| Posted: Fri Mar 13, 2015 10:55 pm Post subject: |
|
|
Thanks for the advice, I'll have a mess about with LEDs and see what works.
The switch gear casings are baking on the radiator, not my best work but strangely in keeping with the KH build, quickly done, and not that bad.

I'll let them dry overnight and put the electrics back in them tomorrow. The chrome/lacquer handlebars, headstock bolt and washer don't look too bad either, and I hope the lacquer will hold the surface rust at bay for a while.
I'd like to get the front end back together over the weekend, bars, switch-gear, clocks, lights, indicators, ignition and such so I can see what's missing from the wiring loom and what I have to do.
The other major job is trying to make the CBR125 rear shock work with the MX swing arm. I need to mock up some brackets to see if it will work on the linkage or if it need to be direct acting like the Honda. I'll do the easy stuff first, then come back to the rear suspension.
_________________
Light is right. |
|
| Back to top |
|
|
arlurt
Show Star !
Joined: 28 Nov 2006
Posts: 680
Location: North Yorkshire
|
| Posted: Sat Mar 14, 2015 8:38 am Post subject: |
|
|
Looking at the picture above this morning I'm always impressed with the camera's ability to flatter. Never buy a bike just because it looks good in the photos!
Up at a reasonable time this morning, switchgear reassembled, greased, and back on the handlebars. It's all better than it was, and in line with the aim of making the KH usable.
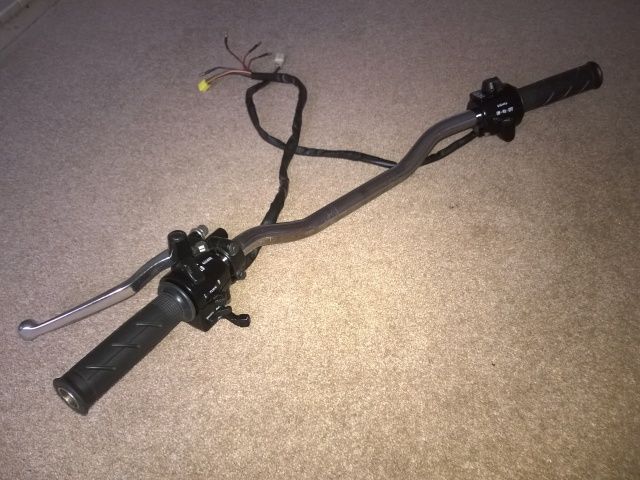
The grips from my old CB1000R are much better than the clunky and hard period ones that were fitted. I've got some modern bar-ends on the way from eBay to replace the scuffed plastic ones that were fitted, and to finish it all off.
_________________
Light is right. |
|
| Back to top |
|
|
arlurt
Show Star !
Joined: 28 Nov 2006
Posts: 680
Location: North Yorkshire
|
| Posted: Sat Mar 14, 2015 4:40 pm Post subject: |
|
|
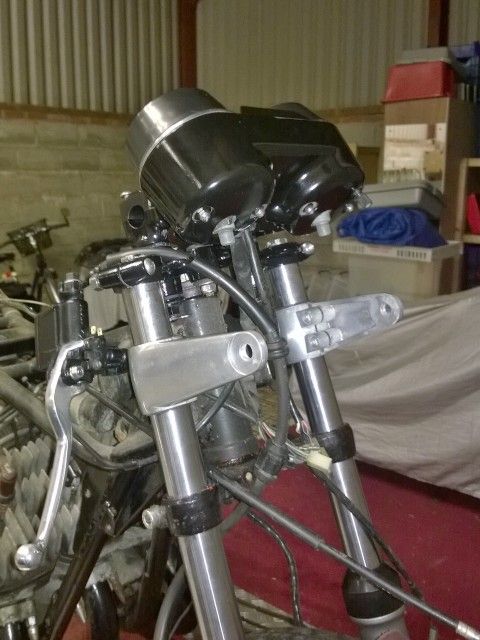
I've done a bit more this afternoon. Handle bars back on the bike with the top yoke properly fitted. Choke and throttle cable connected. Front brake master cylinder and lever fitted and brake bled. The handlebars and headstock bolt both look better than I'd hoped. They'll do for this project.

The clutch cable doesn't want to work with the Honda lever and bracket. Even with all the adjustment taken there isn't enough inner cable to reach the lever. I'll have a proper look later, maybe the outer cable has come out of an adjuster or socket somewhere.
The LEDs were a bit of a flop. They're too long to use in the idiot lights, who'd have though there'd be less than 2mm between the top of the bulb and the coloured lens? The LED didn't work very well as instrument lights either, maybe they're too directional.
I've fitted the new standard bulbs I have to the idiot lights and instrument lights. Then I thought I may as well connect a battery and see what happens...
Ignition ON and I've got a neutral light. The light gets slightly brighter when the kill switch is moved to OFF so the ignition must be pulling power as well. It's been a long time since this bike has a any electricity flowing through it.
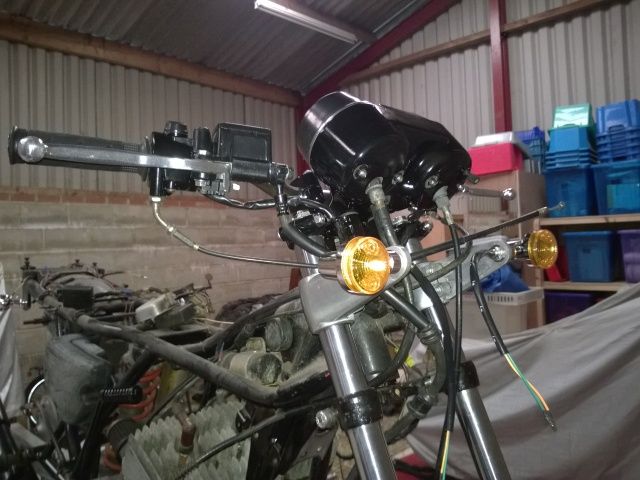
Speedo and Rev-Counter cable connected, and my new (£1.99 from China) indicators bobed on to see how they look. Nice, much more in keeping than the black ones I had before.
_________________
Light is right. |
|
| Back to top |
|
|
|


